It’s that time of the year again when the trees are shedding their leaves, the air is getting cool and crisp, and the sun is going to bed a heck of a lot earlier. You may notice a craving for warmer and fuller meals, spices and of course… all things PUMPKIN!
If you’re in the mood to get creative, give this pumpkin bong tutorial a try.
What you will need:
– 1 pumpkin
– Carving knife
– Glass downstem
– Bowl
– Sharpie marker
– Spoon
– Decorating materials such as paint or glitter.
Instructions:
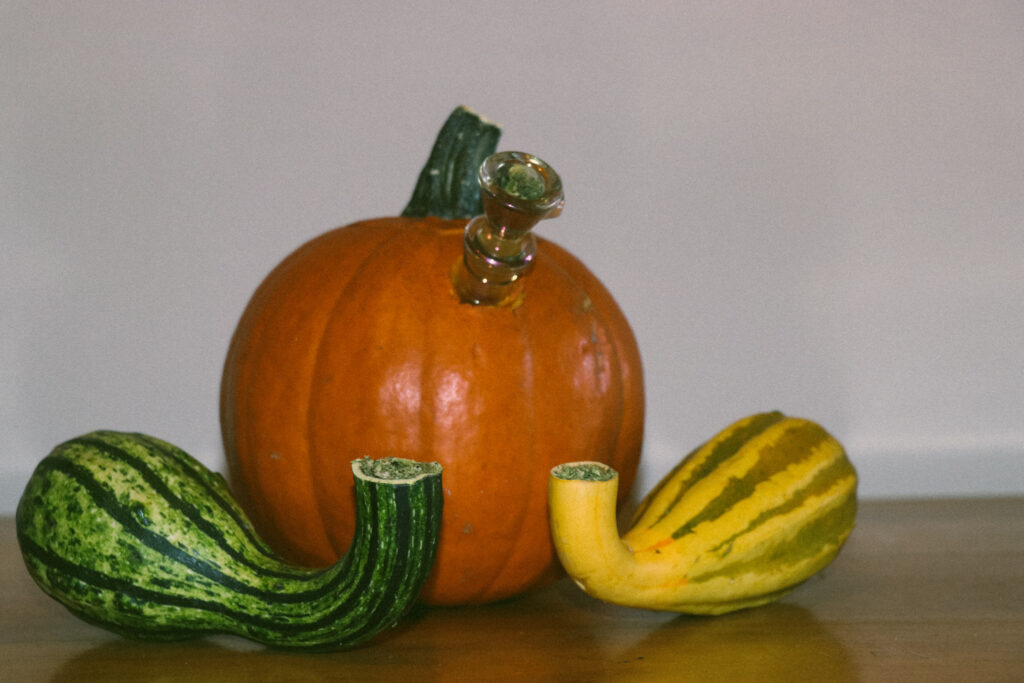
- Choose your Gourd
Consider the height and overall size. You want to be able to fit in the downstem and mouthpiece, but also be able to hold it securely.2. Mark a spot for Downstem/ Mouthpiece
 Make sure to mark a spot for your mouthpiece on your pumpkin before you make any cuts. The downstem should be at a 45-degree angle going down toward the bottom of the pumpkin. The mouthpiece should be closer to the top, but you can play around with what is comfortable for you to hold. The hole you make at the top of the pumpkin should be wide enough to scoop out the inside, but not big enough to prevent you from using the mouthpiece.
 3. Cut the top off
Using a sharp knife or blade, responsibly of course, cut the top off your pumpkin. Try to make the cut as smooth as possible, as you will need the top piece to seal the bong.4. Clean the inside of the pumpkin
 Scoop out the guts of the pumpkin and then use water to gently flush out anything extra. Once you’re done cleaning it out, place the top of the pumpkin back on.
 5. Insert Downstem, Bowl and Mouthpiece
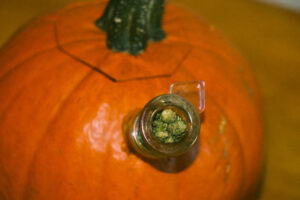
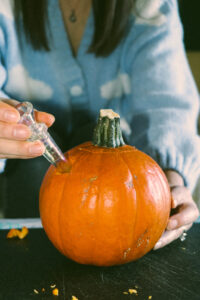
Gently insert your glassware into the pumpkin.6. Add water
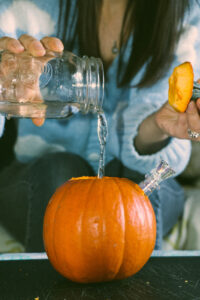
Add water to the middle of the pumpkin, so that it comes to the bottom inch of the downstem. This will give you a much smoother toke!
7. Decorate
Get creative with your pumpkin bong and make it as spooky or cool as you want!
